?在使用win7系统电脑的时候,有时候需要使用宽带连接来拨号上网。在重装或升级系统后,我们怎么宽带连接呢?下面,小编就跟大家聊聊Win7系统创建宽带连接的操作方法。
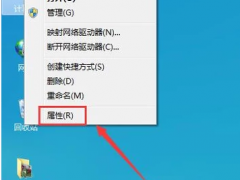
1、点击“开始”按钮,选择打开控制面板。进入后,找到并点击“网络和共享”,进入网络共享中心,在“更改网络设置”下方点击“设置新的连接和网络”

2、点击“连接到Internet”,然后点击“下一步”

3、选择“宽带连接”

4、输入用户名和密码(此用户名和密码均为运营商提供),接着勾选“记住此密码”,“连接名称”可自行更改,最后点击“连接”即可

?以上内容就是Win7系统创建宽带连接的操作方法,希望对大家有所帮助!
![笔记本安装win7系统步骤[多图]](https://img.jiaochengzhijia.com/uploadfile/2023/0330/20230330024507811.png@crop@160x90.png)
![如何给电脑重装系统win7[多图]](https://img.jiaochengzhijia.com/uploadfile/2023/0329/20230329223506146.png@crop@160x90.png)

![u盘安装win7系统教程图解[多图]](https://img.jiaochengzhijia.com/uploadfile/2023/0322/20230322061558376.png@crop@160x90.png)
![win7在线重装系统教程[多图]](https://img.jiaochengzhijia.com/uploadfile/2023/0322/20230322010628891.png@crop@160x90.png)
![win11设置传统任务栏的详细步骤[多图]](https://img.jiaochengzhijia.com/uploadfile/2022/0401/20220401204326810.png@crop@240x180.png)
![win7系统重装后卡怎么回事 怎么解决[多图]](https://img.jiaochengzhijia.com/uploadfile/2022/0328/20220328020328823.png@crop@240x180.png)
![win7怎么升级到win11系统 win7升级到win11系统的方法介绍[多图]](https://img.jiaochengzhijia.com/uploadfile/2021/0704/20210704122834683.jpg@crop@240x180.jpg)